
Define the WellAcquisition OSDU Types
Import existing OSDU Schema types like WellLog and Wellbore.
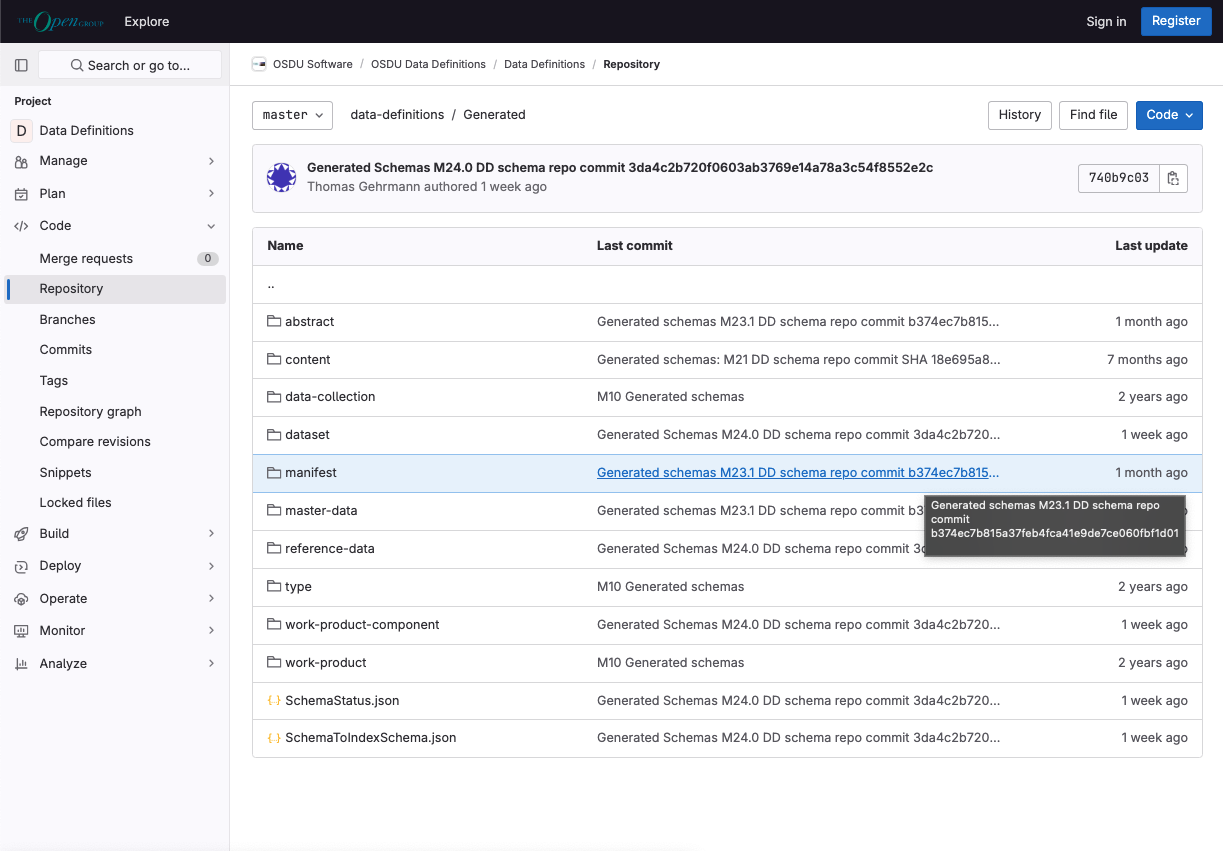
First we have to locate the files on OSDU website.
Locate the OSDU Schema files
Import WellLog
- -Click on green the OSDU IMP button or Open the left top “Hamburger” menu again, click on “OSDU IMPORT/EXPORT” and select “OSDU IMPORT.”

- -Click on the link at the bottom of the dialog, to open OSDU Data definitions on GitLab. A new Browser Tab is opened
First we will import the current version of WellLog.1.4.0.json with all properties and relationships (proxies).
We recommend making a new Modelview for this.
-Find and open the WellLog.1.4.0.json file in the work-product-component folder and download it. (Open the file and click on the 'Open raw' button at the upper right.)
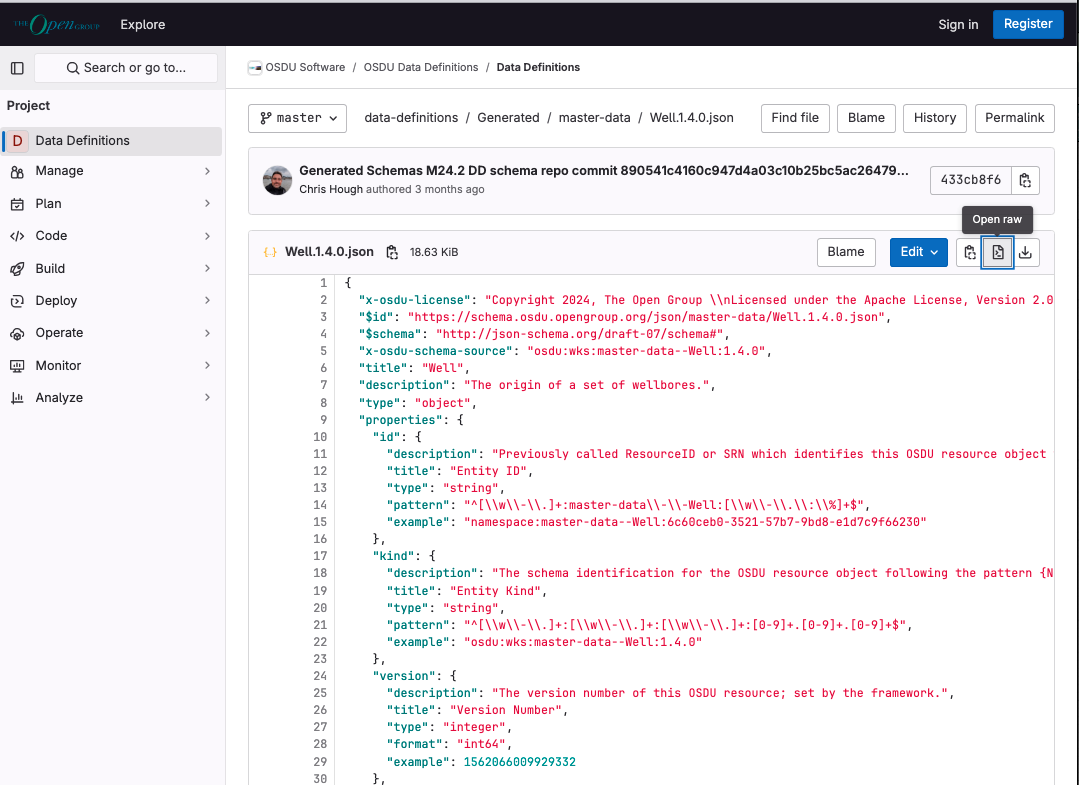
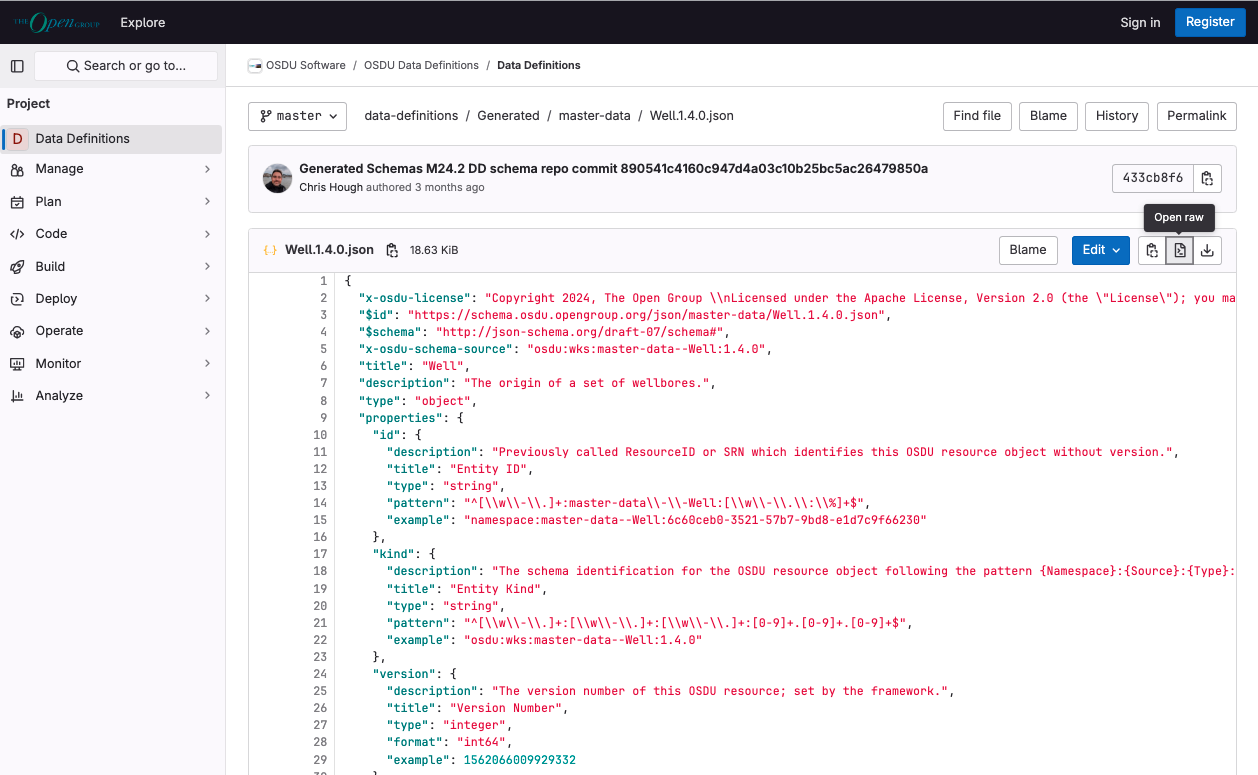
-The raw version of the json file is opened in the browser.

-Copy the URL from the browser address field.
-Paste it into the Import dialog in the field GitLab URL
Select All "Include EntityTypes" in the first row (or only Work_Product_Components) checked.
Select All “Include Properties and Relationships Proxies" in the second row of the import dialog.
We need all existing properties, proxies etc. for WellLog to understand the impact of the new acquisition extension.
- -Click on the “IMPORT JSON URL FROM GITLAB” button.
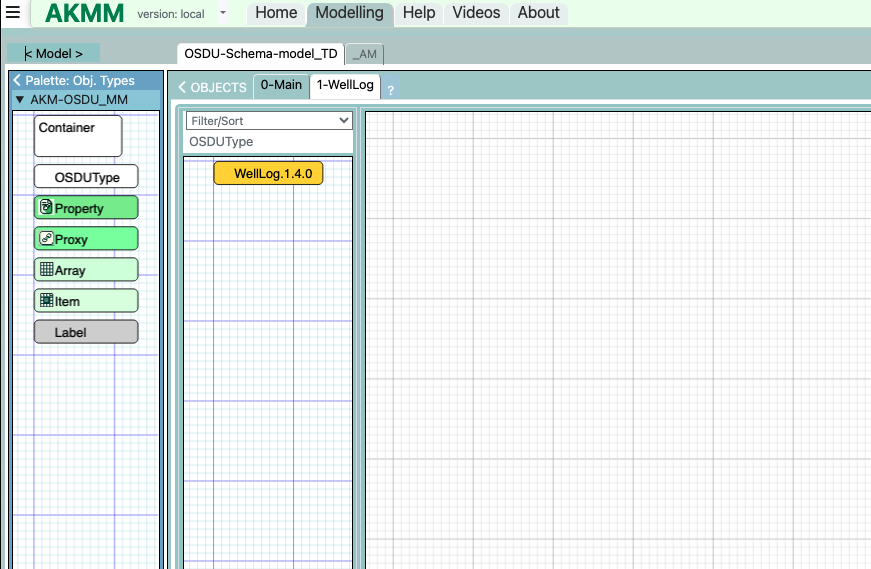
The imported objects show up in the OBJECTS Palette to the left.
(Click on the “< OBJECTS” (white text) in the upper left corner of the modelling area to open the palette)
Import Wellbore without the properties
-Click on the OSDU IMPORT button again
-Uncheck all check-boxes in second row “Include Properties and relationships Proxies” and leave all in first row “Include EntityTypes”
Let all in check-boxes in second row be un-checked.
We only want the master OSDU object for Wellbore, and no additional properties or proxies
(As we are not going to make any changes to the Wellbore entity type. We can import that later if needed).
- -Copy paste the URL raw link for the Wellbore.1.4.0.json file from the GitLab page into the Import dialog, and click on the “IMPORT JSON URL FROM GITLAB” button.
Repeat the same for the Type.1.0.0.json file
The Type object will be used as you will see later, as a template for new OSDU EntityTypes (OSDUTYPES).
You can also import all related existing objects, like “abstract”, “reference-data”, “master-data” and “work-product-component”
NB! Here we only need to import the object without any properties and proxies (the check-boxes in second row of the import dialog, is all unchecked.)